Category Archives: Projects

LAMPAN Ikea

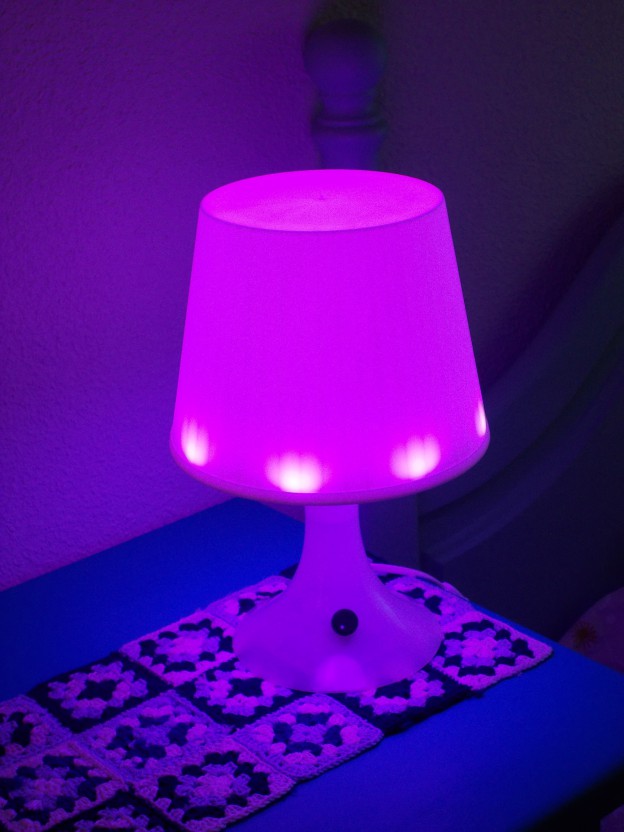
Hacking a LAMPAN Ikea lamp

UPDATE: This project appears on Hackaday’ Blog. For me it’s an honor, I only can say tanks!!!

This project starts a few weeks ago. My six years old daughter usually sleeps with a light on in her bedroom. Talking with her, we decide to hack her LAMPAN Ikea lamp to make some improvements, including a manual RGB controller to set the light colour, a timeout to turn off the light after 30 minutes without changes and a bluetooth connection to control the lamp with a smartphone or tablet. So, if you continue reading  the post, you’ll see what we develop! Continue reading
  • Twitter
  • del.icio.us
  • Digg
  • Facebook
  • Technorati
  • Reddit
  • Yahoo Buzz
  • StumbleUpon
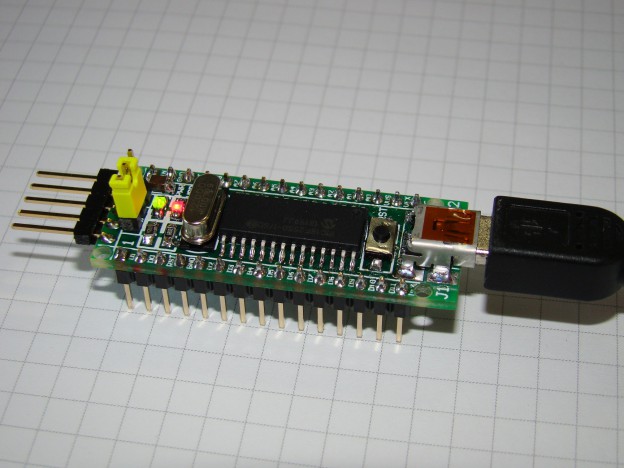
PIC18F2550 breadboard

PICnano breadboard based on PIC18F2550

UPDATE: Thanks to Rando, now you can order this PCB on OSH Park. Thanks!!

UPDATE: If you’re interested in mount the board yourself, now you can download the Bill Of Materials (BOM). Happy welding!

Hi all! With a bit of delay, here’s my last work, a PICnano breadboard based on the PIC18F2550 microcontroller. I have in mind a new project and I want to use an small board, like the Arduino Nano board. This new project is battery powered (3,7V Li-Ion battery). After checking the schematics of the Arduino Nano, I see that the microcontroler is powered at 5V. Of course, I can unmount the linear regulator (U3) that is on the board, and bypass the VIN to the microcontroller power supply. But I think it’s funny try to develop a new module when you’ve access to the microcontroller power supply! Also, I want to work with PIC microcontrollers after many years, so here’s what I design!

Continue reading

  • Twitter
  • del.icio.us
  • Digg
  • Facebook
  • Technorati
  • Reddit
  • Yahoo Buzz
  • StumbleUpon
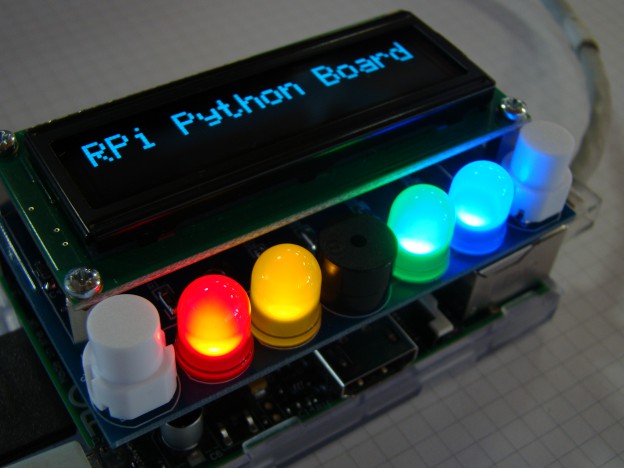
RPi Python Board

RPi Board, a board to learn Python with the Raspberry Pi

UPDATE: This board appears on Adafruit’s blog. I’m very happy with this, it’s a great recognition and I only can say Thanks!!!

I’m continuing working with Juan Brito and Danny Macancela from the blog Desafio Ecuador, developing new boards to bring near the technology and programming languages. Our last work is a board to use with the Raspberry Pi and focused to learn Python. The board has the basic elements to start with this language. Also, with the develop of the PCB we remove the wiring, avoiding troubles with connections, inversion polarity…So with this board you only focused in the software develop, because the hardware side will work!

Continue reading

  • Twitter
  • del.icio.us
  • Digg
  • Facebook
  • Technorati
  • Reddit
  • Yahoo Buzz
  • StumbleUpon

Prototyping Board to use with IP55 box

DSC04972Normally, when I start a project, I use prototyping boards to mount the components and develop the software. When the project is finish, I always have the same trouble: in witch box or enclosure I put the electronics? If you don’t have this in mind at the start of the project, it could be a serious problem. In these years, I discover that is more easy to first find and enclosure and then develop the electronics that do it backwards. Also, I usually develop systems for both indoor / outdoor, so protection against rain and humidity usually it’s a must. For these reasons, I decide to find a good enclosure and develop a prototyping board to use with it. In this post you’ll see the results!

Continue reading

  • Twitter
  • del.icio.us
  • Digg
  • Facebook
  • Technorati
  • Reddit
  • Yahoo Buzz
  • StumbleUpon

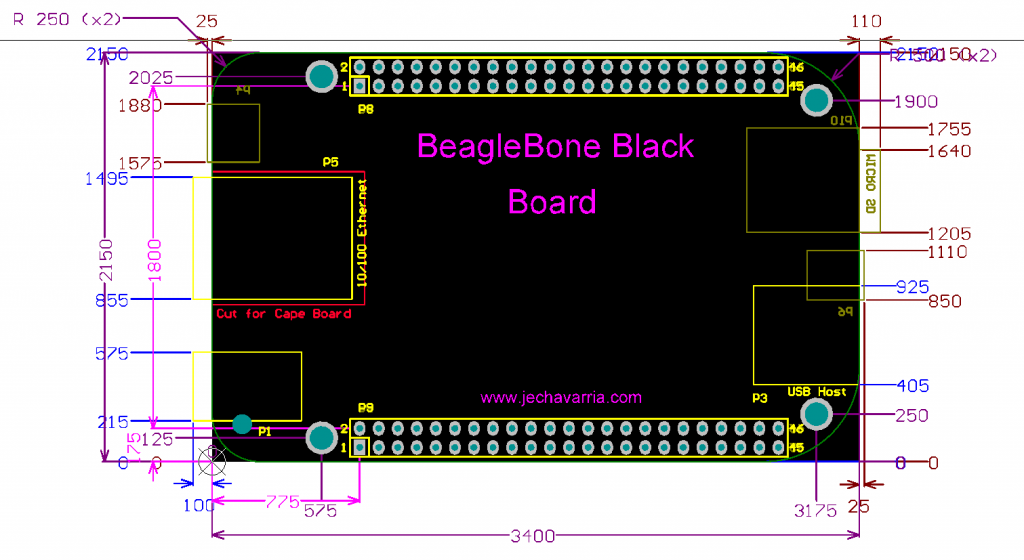
BeagleBone Black Board Dimensions

BB_OUTLINE

In the last months, I make some boards based on the BeagleBone Black board (three at this time!). In these projects, I only develop the hardware platform, the carrier board where it will be mounted. For the develop of this kind of boards, mechanical information provided by the manufacturer is very important, and enough in the most cases. In the case of the BeagleBone Black board, this info is included in the Reference Manual: BBB_SRM. But I don’t find some interesting distances that I need for my boards, so I take a board, I measure it and here are the results.

Continue reading

  • Twitter
  • del.icio.us
  • Digg
  • Facebook
  • Technorati
  • Reddit
  • Yahoo Buzz
  • StumbleUpon

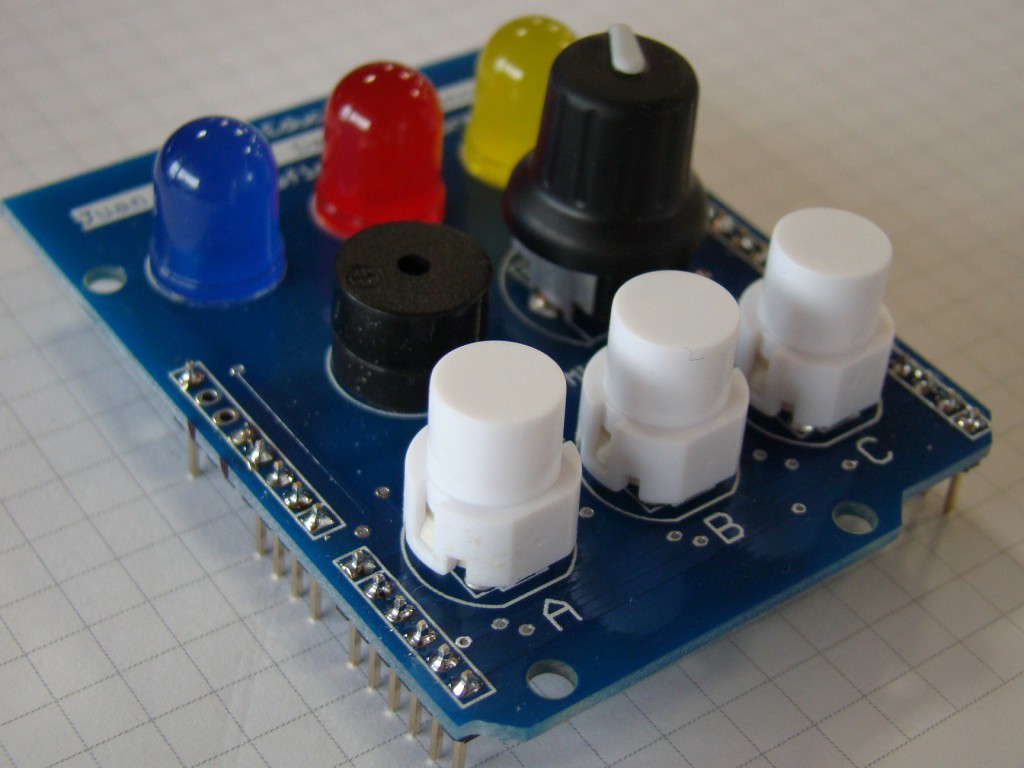
K4S, a Keyboard for Arduino to use with Scratch

wDSC03591

Update: In element14 communinty says this project is awesome!

This project starts a few months ago. Juan Brito, author of the blog Desafio Ecuador, contacted with me to talk about Scratch and the opportunities that gives this programming enviroment in the world of education. In his own words:

I and Danny Macancela are convinced that increase the quality of education in schools and colleges do not require big budgets by governments. This ideal of change has led us to develop this project to teach children mathematics and programming. Children can learn maths with fables. The aim of this project is the search of the human talent growth, which starts in the classroom. As Fritjof Capra says, ‘Today we have the knowledge, technology and financial resources to build a sustainable future. All we need is the  political will and leadership’

From here, I also want to thank Danny Macancela for his illusion in the project and its economic support.

Continue reading

  • Twitter
  • del.icio.us
  • Digg
  • Facebook
  • Technorati
  • Reddit
  • Yahoo Buzz
  • StumbleUpon

SIM900 Breakout Board

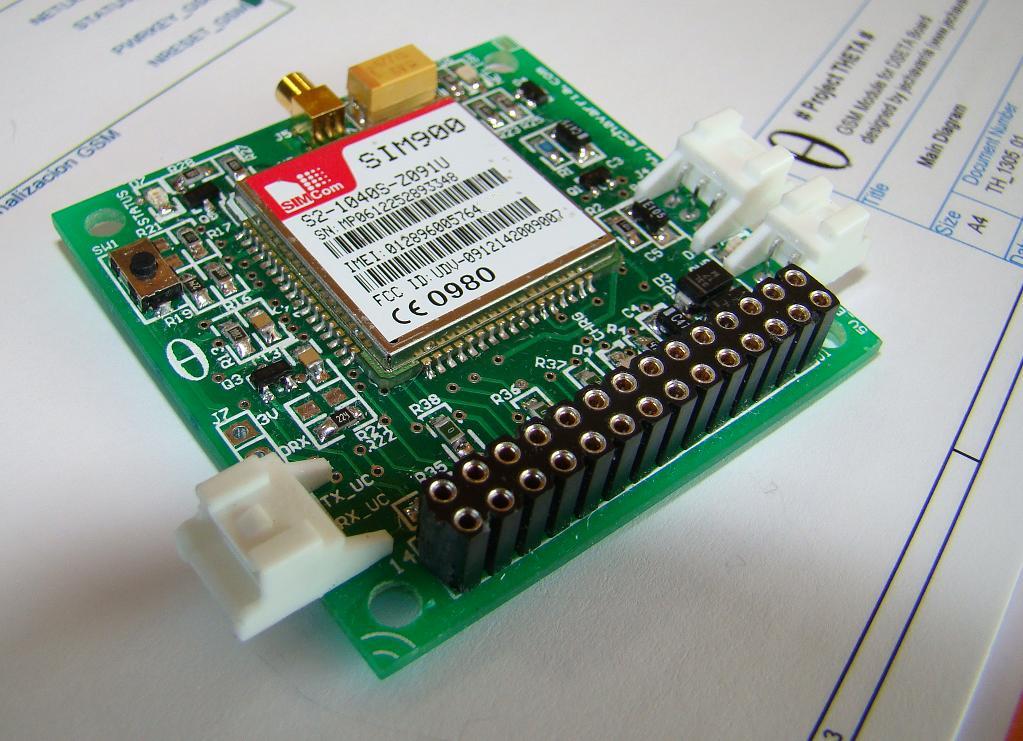
SIM900 Breakout BoardAfter some months out, I come back with my last board, the SIM900 Breakout Board. It’s a board based on the popular SIM900 GSM modem, and I design to work with the DSETA board I develop previously. Also, the board can be used without this board, I try to design it in the way that can be used with any microcontroller. From here, I want thanks to Ioannis Kedros from Embedded Day his support in the design of the battery charger, and to Sonia Muñoz, FAE from EBV, a great professional and a better friend, she always helps me when I need. So, let’s go to see what’s inside the board! Continue reading

  • Twitter
  • del.icio.us
  • Digg
  • Facebook
  • Technorati
  • Reddit
  • Yahoo Buzz
  • StumbleUpon

DSETA board, a CPU based on the Atmel AT89C51RE2

DSETA CPU based on AT89C51RE2 ATMEL microcontroller

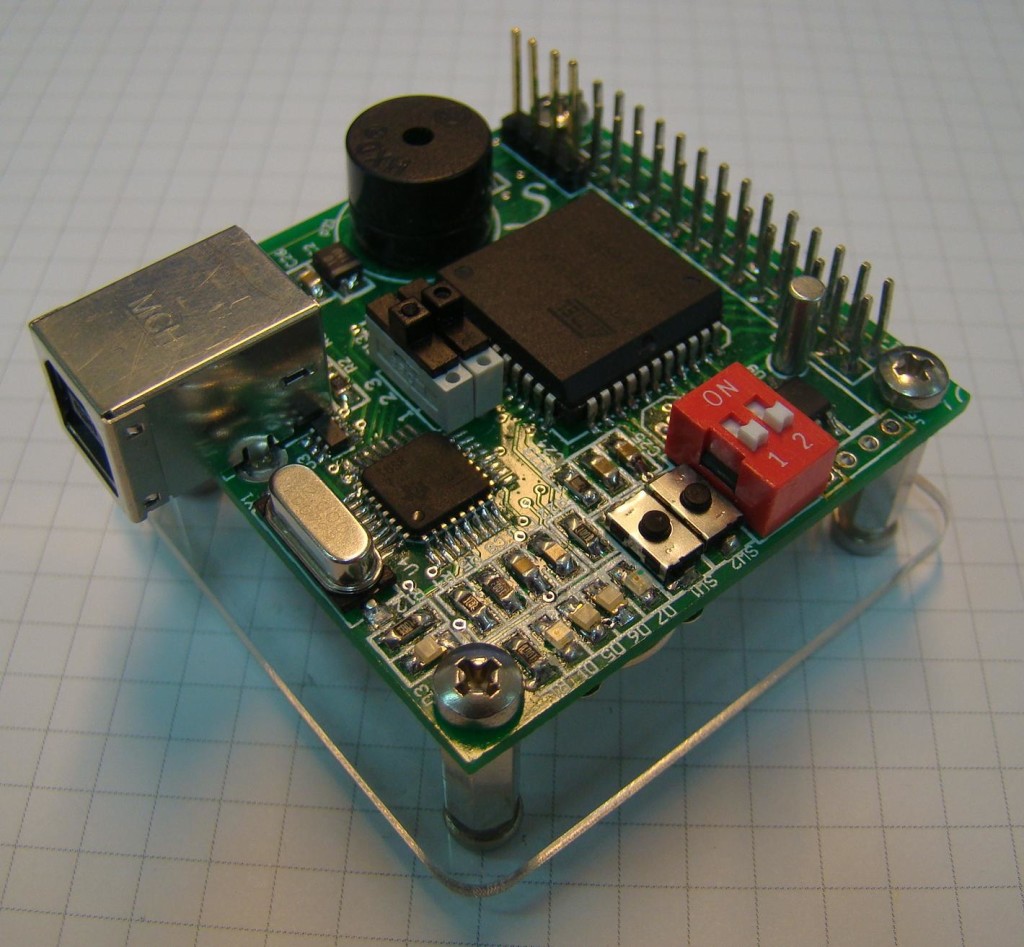
In my last projects, I always use the same CPU. DSETA board, I say in the posts. Well, here it is, a CPU based on the AT89C51RE2 microcontroller from Atmel. I develop this board for some reasons. The first and main one is because I want to have a small board with a great (an known) 8-bit microcontroller, ready to use and with many of the peripherals I usually use. The other reason is that I want to test the PCB service from Seeedstudio, a PCB manufacturer from Shenzhen, China. Here are the results. Continue reading

  • Twitter
  • del.icio.us
  • Digg
  • Facebook
  • Technorati
  • Reddit
  • Yahoo Buzz
  • StumbleUpon

How to interface 8 LCD displays and 24 leds with only two wires

DSC01259

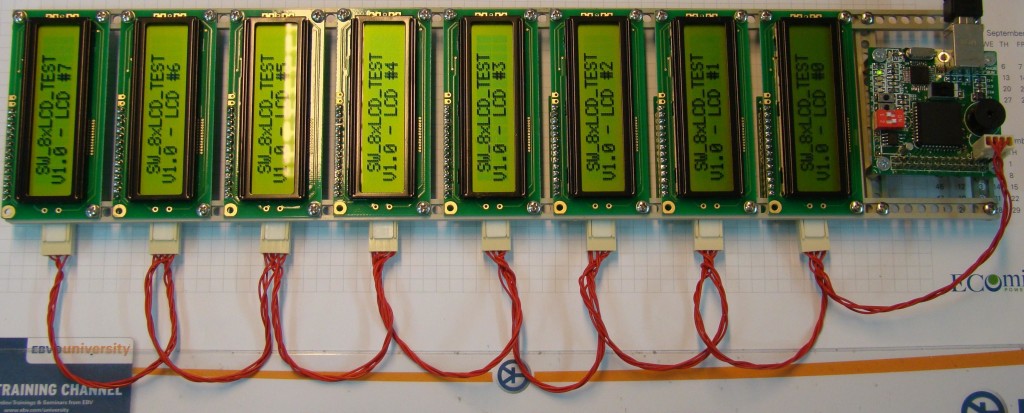
A couple of weeks ago, I just post a review of my MCP23017 breakout board. As the board configuration allows to connect up to 8 of these boards, I decided to do it and see that it really works. My goal is interface 8 LCD displays with two wires: SDA and SCL from an I2C bus. With direct IO`s of a microcontroller, you need at least 48 lines to control all the displays. With this option (and a little of software, of course), you can do this with only two lines.

Continue reading

  • Twitter
  • del.icio.us
  • Digg
  • Facebook
  • Technorati
  • Reddit
  • Yahoo Buzz
  • StumbleUpon
MCP23017 Breakout Board

MCP23017 Breakout Board

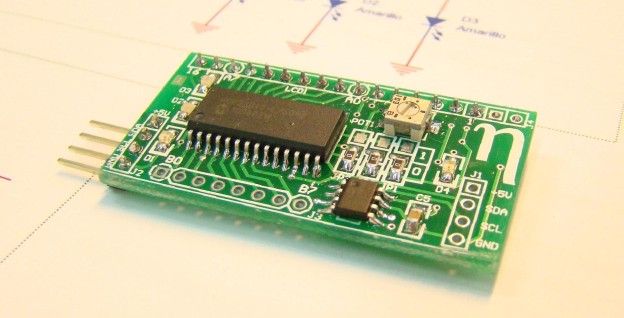
I develop this MCP23017 Breakout Board to interface a 2×16 LCD display with any microcontroller using a standard I2C bus. Typical 2×16 displays needs at least 6 lines to work (when working in 4-byte mode); in some cases, this will be prohibited for some microcontrollers. With this board, you can control it with only two lines (I2C bus) and, by the same price, obtain a few more IO’s. I use the MCP23017 I2C expander as a bridge. This integrated circuit provides 16 IO’s over a standard I2C bus. All the pins can configure as inputs or outputs independently, and supports high speed I2C (up to 1,7MHz). Also, this device has three hardware address pins that allow connecting up to 8 devices in the same bus. The rest of the features can be seen in the datasheet.

UPDATE: Dominic Amann shared this board on OSH Park, you can order here: https://oshpark.com/shared_projects/KNHdhwLN Continue reading

  • Twitter
  • del.icio.us
  • Digg
  • Facebook
  • Technorati
  • Reddit
  • Yahoo Buzz
  • StumbleUpon